


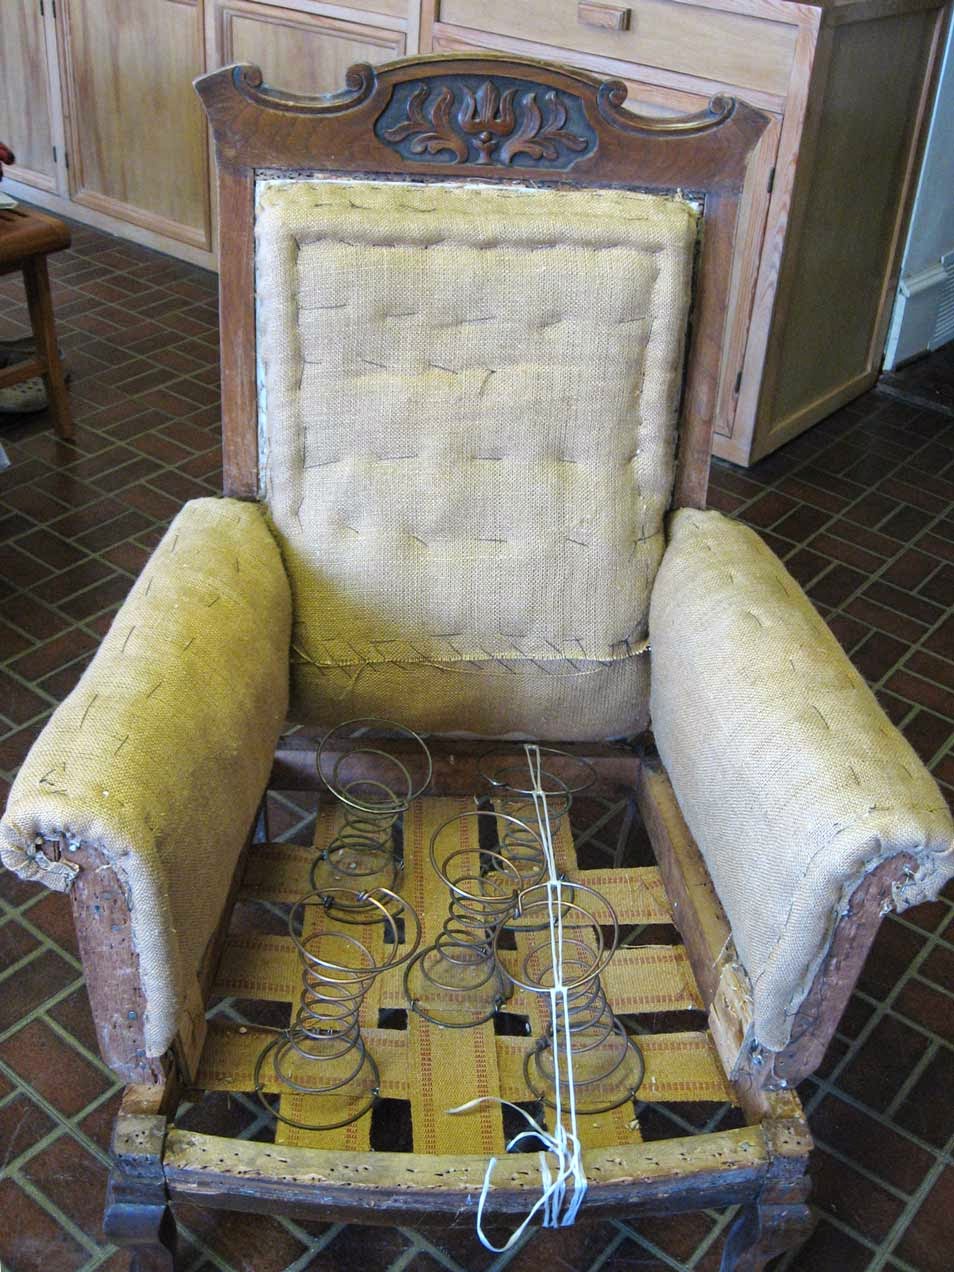
I'm almost embarrassed to show these Before photos of the chaise and one of the two matching chairs which we bought at an auction thirty plus years ago. We'd had them reupholstered professionally back then, but when they started wearing out, I simply couldn't find the right fabric for the furniture and for the upstairs sitting room they occupy. As you can see, the situation was getting dire: the old fabric was disintegrating and the springs were sagging and poking every which way.
 Here in Dallas we're lucky to have a lot of great discount fabric stores, and in my quest for that elusive fabric, I amassed quite a collection of samples. I bought a yard of a couple of fabrics that seemed promising only to reject them when I tried them out at home. And then I not only found a fabric both Mr. C and I liked, it only cost $70! Yes, for all of it!
To keep it from looking too utilitarian, I made the trim out of the silky fabric; the embroidery just shows as white accents on the cord.
At this point we had decided to tackle the job ourselves. From the pile of books I borrowed from the library, the two we found most helpful were Singer Upholstery Basics Plus by Steve Cone and Spruce: a step-by-step guide to upholstery and design by Amanda Brown. I especially like the latter book because of a visual chart which shows the pages for specific design features, such as rolled arms or a tight seat. And after much searching on the Internet, the videos from DIY Upholstery Supply were the ones we repeatedly referenced. That was also where we ordered our supplies; you can find everything you need there.
We began at the end of December and had it all essentially finished by the end of March. Here are the After photos, ta-dah!


Yes, there are some flaws which I know about, but you mostly can't see. And I found it extremely stressful. Unlike sewing, where you can usually take apart and re-do if something goes amiss, a lot of the steps here were final. Plus, there was no practicing, just doing. We had to do it right, or as right as possible, the first time. But it was also interesting, and it's always empowering to satisfactorily complete a challenging project, especially one that involves learning new skills. If you would like to see some of the specific steps in the transformation of these pieces, read on.


Over the re-tied springs goes a layer of burlap and then an edge roll. Next a layer of cotton batting, followed by the custom-cut foam, which comes in various thicknesses and densities.


 You can get an idea in the photo at left of just how messy and dirty this whole project was. And here's an action shot of Mr. C putting the chaise springs right.
The strange plastic was stitched to the burlap on the chaise; everything was in good shape, so we simply put the batting and bonded Dacron over it and proceeded with the fabric.


Last was covering the double welt cord with bias strips of the silky fabric and hot-melt gluing it to the raw edge of the fabric next to the exposed wood. There's also covered single cord on the front panels of the rolled arms and on the chaise end, along top of the outside back and at the curve of the inside back.


All finished! And comfortable, too. Oh yes, I also sprayed them with Force Field UV Sunblock for Fabrics and Upholstery, Rug and Fabric Protector, neither of which affected the feel of the fabric at all.


No comments:
Post a Comment